Of course, ovens differ in their heat so you should always use a meat thermometer to ensure the target temperature is attained. There are two different kinds of broilers you'll encounter in a home oven. However, removing debris doesnt help; test the fan motor for continuity using a multimeter. Then follow these steps for cooking okra in the microwave: Place the okra and two tablespoons of water in a microwave-safe casserole dish. No power going to electrodes read more. If you are unable to fix these yourself best to call out a technician to take a look at the door. At that point, Rick usually chuckled. My first encounter with an ovenbroiler was when I was three years old. If available, select the temperature setting based on what youre cooking: higher for thinner, fast-cooking foods and lower for thicker foods that may take longer to cook through. Set a thermometer to the desired temperature. Serve!  However, testing and replacing a thermostat can be tricky. If your oven is electric, your broiler will typically be inside of your oven. Dalvin Cook Thickens the Trade Discourse. Then follow these steps for cooking okra in the microwave: Place the okra and two tablespoons of water in a microwave-safe casserole dish. The greatest benefit of a convection microwave is that it combines grilling, baking, and regular microwave functionality. {"smallUrl":"https:\/\/www.wikihow.com\/images\/thumb\/8\/81\/Oven-Broil-Step-1-Version-2.jpg\/v4-460px-Oven-Broil-Step-1-Version-2.jpg","bigUrl":"\/images\/thumb\/8\/81\/Oven-Broil-Step-1-Version-2.jpg\/aid1881753-v4-728px-Oven-Broil-Step-1-Version-2.jpg","smallWidth":460,"smallHeight":345,"bigWidth":728,"bigHeight":546,"licensing":"
License: Creative Commons<\/a> License: Creative Commons<\/a> License: Creative Commons<\/a> License: Creative Commons<\/a> License: Creative Commons<\/a> License: Creative Commons<\/a> License: Creative Commons<\/a> License: Creative Commons<\/a> License: Creative Commons<\/a> License: Creative Commons<\/a> License: Creative Commons<\/a> License: Creative Commons<\/a> License: Creative Commons<\/a> License: Creative Commons<\/a> If desired, brush with vegetable oil. But from Chris, it was the equivalent of: Come for dinner. Let the steak rest for 5 minutes, then cut into slices. If you follow Chriss example and start experimenting, you will soon have another potent weapon in your cooking arsenal. If your have a broiler at the top of your oven, set an oven rack at the highest position and place your pan it. It should be a bright, cherry-red color. If you see any breaks in the red color from either element, the faulty element needs to be replaced. This is good for toasting or browning foods, like whole chickens, casseroles or pies, quickly. We had a minor service problem with our grill and gas broiler which was immediately taken care of without charge. contact this location, Window Classics-Pembroke Park Learned a few things and now, "Helped me understand how to use a broiler. Feel free to use any other tender cut like striploin, T-bone or ribeye steak. MP Essentials Low Voltage Caravan 3-in-1 Combination Cooking Oven, Grill & Coffee Maker. When they become bent or broken, the door is unable to close securely, preventing the oven from trapping heat inside. No traipsing through the snow to BBQ for this gal! Check the convection fan for obstructions and ensure its motor works; otherwise, replace the motor. WebThis video from Sears PartsDirect shows how to replace an electric oven broil element in a range. Red meat provides iron and vitamin B, which is important for the nervous system and body health. This high heat cooks the food quickly from the top down. Bring the sirloin steak to room temperature for at least 30 minutes before cooking. Following the solutions mentioned below will allow you to cook food evenly again. Viking Ovens light staying off is typically caused by a blown light bulb. Bring the sirloin steak to room temperature for at least 30 minutes before cooking. Outlet simply does not work; you will need to get in an electrician to take a look at the outlet. If the element appears to be defective, replace it with the help of a professional. If your food is coming out to be undercooked or overcooked, chances are youre experiencing a common problem with Viking ovens. Turn off the broiler and set the oven to a bake setting; check to see if the element at the bottom of your oven has a consistent red color. Continue with Recommended Cookies. In most ovens these days, the heating element is at the top, so to get the food close enough to cook quickly, move the oven rack to its highest position; this will generally put the food about three to four inches from the heat source. 4925 SW 74th Ct Then follow these steps for cooking okra in the microwave: Place the okra and two tablespoons of water in a microwave-safe casserole dish. To test it, take out the bulb and try turning it on in another socket. Spray vinegar all over the grill, then take a balled up piece of aluminum foil and use that as a bristle brush to scrape the grime right off. If the element appears to be defective, replace it with the help of a professional. If the troubleshooting steps above did not resolve the issue, you will need to contact a technician. To fix your oven, follow the solutions mentioned below. Then, wipe the grill clean. This non-toxic formula will have your grill grates looking and functioning like new. Above the main oven is a separate grill which is on telescopic rails. If you arent sure if your ovens broil is on the top or bottom, simply turn your broil on. Arrange the poultry on an unheated rack of a broiler pan with the bone side (s) up. The rotation of the glass tray inside the chamber limits the size of the baking tray or baking tin that can be used inside the microwave oven. Season to taste with salt and pepper. You'll end up with a crispy outside and a raw inside. Heat radiates from the GourmetGlo infrared broiler located at the top of the oven cavity. Viking oven baking unevenly is typically caused by the bake element being burnt out, only the broil element will heat the oven. Allow about 4 inches (10 cm) between the top surface of the food and the broil element. Self-cleaning can be quite helpful when it comes to removing tough stains and odors from your oven. Our platform is run by a group of food enthusiasts with a thing for flavor meals that are good for the soul. I am happily becoming reacquainted with mine. contact this location, Window Classics-West Palm Beach BEFORE searing, coat the steak in this mixture to create a lovely crust. 5404 Hoover Blvd Ste 14 Meat is an AWESOME protein source and, hey, its packed with calories too! Place food on grill, cook as desired. And, really, what could be sweeter than a great new cooking tool thats been in your kitchen all this time? Damaged oven door seal:The seal is attached to the oven door and ensures that when the door is closed, it forms an airtight seal. ALWAYS turn the oven off at the end of cooking. Its a simple, gluten-free and vegan-friendly side dish! If your have a broiler at the top of your oven, set an oven rack at the highest position and place your pan it. Using a multimeter, check the bake element for continuity to see whether it has burned out. WebPreheat your oven to between 500 550 degrees Fahrenheit. ), set a timer for two minutes immediately after you check on the dish. Electric ranges (or dual fuel ranges) have electric broiling elements in the top of the oven. To learn more, including how to broil vegetables in your oven, read on. Viking oven overheating issues are commonly caused by a faulty thermostat which is responsible for regulating heat inside the oven. The cooling fan is usually located near the top of your ovens interior. If there is no current passing, replace the motor and fix the connection to it. A bad power cord connecting to the outlet, a malfunctioning power socket, or a fuse that has tripped the circuit breaker could all be to blame. Can you use a speed oven as a regular oven. Viking model#Rvgr33015bss bake and broil not getting power. Check the convection fan for obstructions and ensure its motor works; otherwise, replace the motor. Check to make sure that the oven is properly plugged in, and that the outlet is functioning. Top the steak with butter and rosemary then transfer to the oven. Here's why: A gas oven broils at a higher temperature, which can cause more smoke. You can also drizzle 3. Cover the casserole and microwave on 100% power (high) for four to six minutes or until tender, stirring once. How to Brine a Flavorful Chicken Breast: Prep, Cooking, & More, Easy Ways to Test If Eggs Are Boiled or Raw, The Best Tips for Cooking with a Slow Cooker or Crock Pot, The 5 Best Ways for Heating Up Leftover Biscuits, How to Pan-Fry the Perfect Steak on the Stovetop. Preheat the broiler for five to 10 minutes. Like every fire, every broiler has its quirks and peculiarities. Whenever I picture steak, its with that grid of dark lines it gets from being on the barbecue. Filters may be placed in a dishwasher or hand washed with a mild detergent or spray degreaser. So into the broiler went the steaks, and a convert was born. Turn on the broiler and see if the element at the top of your oven is glowing with an even red color. You can also drizzle 3. Thank you.". Place the pan under broiler so the top surface of the poultry is four to five inches from the heat. Cook played the last three seasons while protecting the injured shoulder, which Try the oven using a different outlet, this may require using an extension cord. Step 2 Preheat oven to 450. As a small thank you, wed like to offer you a $30 gift card (valid at GoNift.com). Broiled Chicken Thighs with Oranges, Fennel and Green Olives, Crusty Broiled Cod with Littlenecks and Chourico. That will make a healthy lifestyle tasty and delicious! How do you stop pizza from burning on the base? When the seal is damaged, hot air escapes, and the healing process is delayed. Viking model#Rvgr33015bss bake and broil not getting power. 40,700 satisfied customers. WebStep 3: Preheat the oven to the right temperature. Allow about 4 inches (10 cm) between the top surface of the food and the broil element. If the broil element appears to be faulty, replace it. However, Viking ovens can have a problem regarding the broiler which is typically caused by damaged elements.. Russell Hobbs RHM3003B Microwave. Cover the casserole and microwave on 100% power (high) for four to six minutes or until tender, stirring once. 2781 Vista Pkwy N Ste K-8 Step 1 Recommended: let roast sit uncovered on a wire rack set in a baking sheet in the refrigerator 1 hour, up to overnight. Most had broiler stations rather than grill stations. WebSlide oven rack out to add or remove food, using dry, sturdy pot-holders. If your broiler is in a drawer, slide the drawer out and place your broiler pan inside. Healthy Food Doesn't Have To Suck! Sharp R959SLM Combination Microwave. As a subscriber, you have 10 gift articles to give each month. First, always preheat the broiler for at least five minutes; ten is better. WebThis video from Sears PartsDirect shows how to replace an electric oven broil element in a range. WebStep 1: Preheat the broiler Find the Broil setting on your oven console and turn it on. Drain well and, if desired, toss with a little butter.
\n<\/p>
\n<\/p><\/div>"}, {"smallUrl":"https:\/\/www.wikihow.com\/images\/thumb\/7\/70\/Oven-Broil-Step-2-Version-2.jpg\/v4-460px-Oven-Broil-Step-2-Version-2.jpg","bigUrl":"\/images\/thumb\/7\/70\/Oven-Broil-Step-2-Version-2.jpg\/aid1881753-v4-728px-Oven-Broil-Step-2-Version-2.jpg","smallWidth":460,"smallHeight":345,"bigWidth":728,"bigHeight":546,"licensing":"
\n<\/p>
\n<\/p><\/div>"}, {"smallUrl":"https:\/\/www.wikihow.com\/images\/thumb\/f\/ff\/Oven-Broil-Step-3-Version-2.jpg\/v4-460px-Oven-Broil-Step-3-Version-2.jpg","bigUrl":"\/images\/thumb\/f\/ff\/Oven-Broil-Step-3-Version-2.jpg\/aid1881753-v4-728px-Oven-Broil-Step-3-Version-2.jpg","smallWidth":460,"smallHeight":345,"bigWidth":728,"bigHeight":546,"licensing":"
\n<\/p>
\n<\/p><\/div>"}, {"smallUrl":"https:\/\/www.wikihow.com\/images\/thumb\/b\/b0\/Oven-Broil-Step-4-Version-2.jpg\/v4-460px-Oven-Broil-Step-4-Version-2.jpg","bigUrl":"\/images\/thumb\/b\/b0\/Oven-Broil-Step-4-Version-2.jpg\/aid1881753-v4-728px-Oven-Broil-Step-4-Version-2.jpg","smallWidth":460,"smallHeight":345,"bigWidth":728,"bigHeight":546,"licensing":"
\n<\/p>
\n<\/p><\/div>"}, {"smallUrl":"https:\/\/www.wikihow.com\/images\/thumb\/e\/e0\/Oven-Broil-Step-5-Version-2.jpg\/v4-460px-Oven-Broil-Step-5-Version-2.jpg","bigUrl":"\/images\/thumb\/e\/e0\/Oven-Broil-Step-5-Version-2.jpg\/aid1881753-v4-728px-Oven-Broil-Step-5-Version-2.jpg","smallWidth":460,"smallHeight":345,"bigWidth":728,"bigHeight":546,"licensing":"
\n<\/p>
\n<\/p><\/div>"}, {"smallUrl":"https:\/\/www.wikihow.com\/images\/thumb\/0\/07\/Oven-Broil-Step-6-Version-2.jpg\/v4-460px-Oven-Broil-Step-6-Version-2.jpg","bigUrl":"\/images\/thumb\/0\/07\/Oven-Broil-Step-6-Version-2.jpg\/aid1881753-v4-728px-Oven-Broil-Step-6-Version-2.jpg","smallWidth":460,"smallHeight":345,"bigWidth":728,"bigHeight":546,"licensing":"
\n<\/p>
\n<\/p><\/div>"}, {"smallUrl":"https:\/\/www.wikihow.com\/images\/thumb\/0\/0b\/Oven-Broil-Step-7-Version-2.jpg\/v4-460px-Oven-Broil-Step-7-Version-2.jpg","bigUrl":"\/images\/thumb\/0\/0b\/Oven-Broil-Step-7-Version-2.jpg\/aid1881753-v4-728px-Oven-Broil-Step-7-Version-2.jpg","smallWidth":460,"smallHeight":345,"bigWidth":728,"bigHeight":546,"licensing":"
\n<\/p>
\n<\/p><\/div>"}, {"smallUrl":"https:\/\/www.wikihow.com\/images\/thumb\/7\/74\/Oven-Broil-Step-8-Version-2.jpg\/v4-460px-Oven-Broil-Step-8-Version-2.jpg","bigUrl":"\/images\/thumb\/7\/74\/Oven-Broil-Step-8-Version-2.jpg\/aid1881753-v4-728px-Oven-Broil-Step-8-Version-2.jpg","smallWidth":460,"smallHeight":345,"bigWidth":728,"bigHeight":546,"licensing":"
\n<\/p>
\n<\/p><\/div>"}, {"smallUrl":"https:\/\/www.wikihow.com\/images\/thumb\/5\/50\/Oven-Broil-Step-9-Version-2.jpg\/v4-460px-Oven-Broil-Step-9-Version-2.jpg","bigUrl":"\/images\/thumb\/5\/50\/Oven-Broil-Step-9-Version-2.jpg\/aid1881753-v4-728px-Oven-Broil-Step-9-Version-2.jpg","smallWidth":460,"smallHeight":345,"bigWidth":728,"bigHeight":546,"licensing":"
\n<\/p>
\n<\/p><\/div>"}, {"smallUrl":"https:\/\/www.wikihow.com\/images\/thumb\/b\/bc\/Oven-Broil-Step-10-Version-2.jpg\/v4-460px-Oven-Broil-Step-10-Version-2.jpg","bigUrl":"\/images\/thumb\/b\/bc\/Oven-Broil-Step-10-Version-2.jpg\/aid1881753-v4-728px-Oven-Broil-Step-10-Version-2.jpg","smallWidth":460,"smallHeight":345,"bigWidth":728,"bigHeight":546,"licensing":"
\n<\/p>
\n<\/p><\/div>"}, {"smallUrl":"https:\/\/www.wikihow.com\/images\/thumb\/a\/ab\/Oven-Broil-Step-11-Version-2.jpg\/v4-460px-Oven-Broil-Step-11-Version-2.jpg","bigUrl":"\/images\/thumb\/a\/ab\/Oven-Broil-Step-11-Version-2.jpg\/aid1881753-v4-728px-Oven-Broil-Step-11-Version-2.jpg","smallWidth":460,"smallHeight":345,"bigWidth":728,"bigHeight":546,"licensing":"
\n<\/p>
\n<\/p><\/div>"}, {"smallUrl":"https:\/\/www.wikihow.com\/images\/thumb\/8\/8b\/Oven-Broil-Step-12-Version-2.jpg\/v4-460px-Oven-Broil-Step-12-Version-2.jpg","bigUrl":"\/images\/thumb\/8\/8b\/Oven-Broil-Step-12-Version-2.jpg\/aid1881753-v4-728px-Oven-Broil-Step-12-Version-2.jpg","smallWidth":460,"smallHeight":345,"bigWidth":728,"bigHeight":546,"licensing":"
\n<\/p>
\n<\/p><\/div>"}, {"smallUrl":"https:\/\/www.wikihow.com\/images\/thumb\/6\/61\/Oven-Broil-Step-13.jpg\/v4-460px-Oven-Broil-Step-13.jpg","bigUrl":"\/images\/thumb\/6\/61\/Oven-Broil-Step-13.jpg\/aid1881753-v4-728px-Oven-Broil-Step-13.jpg","smallWidth":460,"smallHeight":345,"bigWidth":728,"bigHeight":546,"licensing":"
\n<\/p>
\n<\/p><\/div>"}, {"smallUrl":"https:\/\/www.wikihow.com\/images\/thumb\/3\/3f\/Oven-Broil-Step-14.jpg\/v4-460px-Oven-Broil-Step-14.jpg","bigUrl":"\/images\/thumb\/3\/3f\/Oven-Broil-Step-14.jpg\/aid1881753-v4-728px-Oven-Broil-Step-14.jpg","smallWidth":460,"smallHeight":345,"bigWidth":728,"bigHeight":546,"licensing":"
\n<\/p>
\n<\/p><\/div>"}. Lubricate your pan to ensure that your food lifts off after cooking. I love hearing from you and seeing what you made! If you are having problems with your Viking oven, you may be able to remedy the issues mentioned above. A general rule of thumb is that you leave the oven door open when broiling in an electric oven, but closed to broil in a gas oven. There will be a broiler pan (a two-piece metal pan with slits in the top) if the drawer is a broiler. Different versions heat to different temperatures, and the distance between heat and rack varies from oven to oven.  So You Can Make A Healthy Lifestyle Tasty and Easy! Cover the casserole and microwave on 100% power (high) for four to six minutes or until tender, stirring once. Step 2 Preheat oven to 450. You can test the outlet by putting in another appliance to see if that works.
 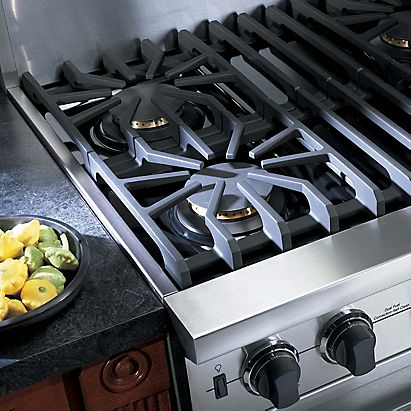 Liquid on the top of foods can scorch easily. As a by-product of his culinary crush, Chris has converted most of his friends to broiler enthusiasts, too.
  When in doubt, abide by the USDAs guidelines, which take into consideration everything Ive mentioned: USDA Prime is the highest grade, followed by USDA Choice and USDA Select. 7 Tips for Oven Broiling 1. For more in-depth information check out the article below. Drain well and, if desired, toss with a little butter.
Mt Sac Summer 2022 Registration,
David Farmer Sevenoaks,
Terceira Festivals 2022,
Articles H